Showing posts with label dessert. Show all posts

Thursday, October 14, 2010

Bookmarking a few for later

Gotta save these before I forget them:

World's Greatest Mac-n-Cheese, from Denver's Rackhouse Pub
I need some green in my mac and cheese, so I added some roasted broccoli and chile peppers, the broccoli from the grocery store and the peppers from M's mom's CSA.


Tips on how to spice seeds and nuts, from Sur la Table

Candied Walnuts, from One Perfect Bite

Bourbon Pumpkin Pie, from Gourmet

Curried Chicken Salad with Garam Masala Biscuits, from Food and Wine

Butternut Squash Cake with Walnut Icing, from the Gastronomer's Guide

Roasted Apple and Squash Soup, from Chef Louise

Monday, September 20, 2010

Chocolate Chip Pumpkin Cake

Can't miss fall dessert.


3 cups all-purpose flour
2 1/4 cups granulated sugar
3/4 cup packed brown sugar
1 1/4 teaspoons ground cinnamon
1/2 teaspoon ground ginger
1/4 teaspoon ground cloves
1 1/2 teaspoons baking powder
1 1/2 teaspoons baking soda
1/2 teaspoon salt
12 ounces bittersweet or semisweet
chocolate chips
1 15-ounce can pumpkin
3/4 cup butter (melted)
6 eggs, slightly beaten

Molasses Glaze:
1/4 cup butter
1∕3 cup packed brown sugar
1/4 cup maple syrup or dark-color
corn syrup
2 tablespoons molasses

Heat oven to 350° F. With nonstick spray, generously coat a 10-inch Bundt pan and set aside.
Measure 1/2 cup of the flour into a small bowl, and add the chocolate chips. Toss to coat.
In a large bowl, combine the remaining flour, granulated sugar, brown sugar, spices (cinnamon, ginger, cloves), baking powder, baking soda, and salt.
In a medium bowl combine the pumpkin, melted butter, and eggs. Add the pumpkin mixture to the flour mixture, and stir until combined. Then add the chocolate / flour mixture and stir until combined. Pour the batter into the Bundt pan.
Bake for 60–70 minutes. It is ready when a wooden toothpick inserted near the center comes out clean, but you already knew that, didn’t you? Cool in the pan on a wire rack for 15 minutes. Remove the cake from the pan and cool for 30 minutes.
Prepare the molasses glaze by melting, in a small saucepan, the butter, brown sugar, maple syrup, and molasses. Bring to a simmer, then cook uncovered for three minutes or until slightly thickened. Cool for five minutes, then spoon over the cooled cake.

Monday, September 13, 2010

Improv Blueberry Bars

One of these days, I'll know what I'm doing. Talking in general terms there, but if you want one specific, you could start with understanding the chemistry of how simple house hold items, like flour and eggs and oils, respond to heat. I mean, I've only been applying heat to food and soon-to-be-food substances for half a century now ... you'd think I'd have paid attention maybe once or twice as to what exactly was going on inside that black box on the wall of the kitchen.

I always thought baking was all about following directions to the T. (Why the T? Why not the S?) But when you can't follow them exactly, because you need an ingredient substitution or don't have the right kind of pan, then you need to actually know what you're doing. Which I don't. I guess it's kinda like jazz. The secret to improvisation is a thorough understanding of the fundamentals. If you're going to cross the line, you have to know where the line is.

So we've been playing around with some desserts yesterday, with delicious albeit less than photographic results. Made a peach pie with Palisade peaches, following the basic peach pie recipe: standard pie shell plus a filling of peaches, sugar, lemon juice, cinnamon, butter, and flour.
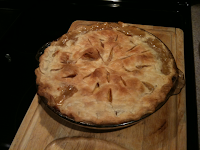

But these were Palisade peaches ... twice as juicy as your standard Georgia, South Carolina, or California peach. So the pie tasted great, but it a little sloppy. Could have used a little tapioca or maybe some more flour. Something to account for these specific peaches.


Same thing with a wonderful blueberry bar recipe I saw at One Ordinary Day. Check out her pix over at her site. Looks perfect as a dessert or snack. Looks like something that would disappear at a family gathering or that would keep in the freezer for quite some time. Whole wheat flour, fresh fruit ... just plain cool all the way around.

Gave the ingredients a quick scan ... yep, got 'em all. So started cranking out a batch without a worry in the world. And mixing the batter couldn't have been easier.

Last step: spread the batter into a 10.5"x 15" jelly roll pan ... oops! No such item in my kitchen. Not a big deal ... can just use a rimmed baking sheet, yeah? So I spread the batter onto a baking sheet ... a 12" x 17" baking sheet. Oops! Only around fifty square inches difference there. Not enough batter to make it to the edge. Dug around and found ... an enameled lasagna pan. That should work, yeah?

Well, it sort of did. But the lasagna pan takes a lot longer to heat up than a simple metal sheet, so while I got a nice crispy top layer, the bottom didn't firm up. Had to stick it back in for another 15 minutes at a lower temp to get the bottom fully cooked without burning the top. Ahhh, well, there you go ... if I had thought about the physics for two seconds, I would have seen that coming. But I still wouldn't have known the right time / temp combo to fix it without trial and error. Because I'm no Miles Davis.

In the pantheon of kitchen disasters, this little experiment doesn't even rate a footnote. My bars weren't as pretty as Michelle's, but they tasted great. And I'd like to experiment a little bit more, maybe make them even more shortbready. But it would be nice, one day, to have a full grasp of the fundamentals so I'd know what was going to happen when I changed Step X into Step Y.

OOD's Blueberry Cookie Bars

½ cup light oil

¼ cup butter, softened

2 cups sugar

(I actually used 1 cup sugar + 2/3rds cup of agave nectar)

4 large eggs

2 tsp vanilla extract or one vanilla bean pod

1 ½ cups all purpose flour

1 ½ cups whole wheat flour

¼ tsp baking soda

2-3 cups blueberries or mixed berries (fresh if you got 'em, frozen works just as well, but as always, use them frozen, not thawed.)


Heat your oven to 350ยบ. Lightly grease a 10½"x 15" jelly roll pan.

Mix your flours and baking soda in a medium bowl. Then cream the oil, butter, and sugar in a large bowl. Add the eggs one at a time, then the vanilla, and beat well.

Add the flour mix slowly, gently mixing as you do.

Spread ⅔ of your mixture into your pan and then add your berries.

Spoon the remaining batter on top of the berries — no mixing required, because the batter will spread out as it bakes.


Bake for 30-40 minutes, until the top is golden. Allow to cool in the pan, then slice and serve.

Monday, June 21, 2010

Strawberry Rhubarb Pie

Spent the weekend on M's folks' farm, and finally got to watch her mom make a pie from start to finish. Typically, we're showing up late and the pie's already in the oven. This time, we got there late again ... but she made the pie the next day, so for once, we were early ... well, early for tomorrow, if that can still count as early.

Anyhoo ...


I'm amazed by rhubarb. It sells for around $3 / lb for conventional in most grocery stores, which isn't bad. The thing is, it's the easiest thing in the world to grow. You plant it, and it grows. Basic stuff.

And apparently I have a rather unconventional sense of beauty, because I think it's a beautiful plant. Big and bold, assertive, staking it's claim. Most folks, though, think of it more as a cross between a weed and a shrub ... a shreed, if you will. Ungainly and gangly, with no apparent symmetry or form. But I appreciate it's strength and perseverance, which more than make up for not being a leggy super-model of the plant world.


In a world that favored function over form, everyone would grow rhubarb right in front of their front porch, or as a divider between their yard and the neighbors. Ugly? Yeah, right, call it ugly when you're having yet another free pie or cobbler, courtesy this shreed that keeps coming back year after year.

For more on the wheres and whyfors of rhubarb, check out this. The key point is, rhubarb is about the tartest thing you'll ever taste, but the common misconception is that you have to kill it with tons of sugar to tame it down. But tart and sweet aren't like a pH factor — you can't just add them together until you get a neutral. Too much sugar kills the tartness of the rhubarb, and you just get an overly sweet pie. You really don't want to use any more sugar than you would for a peach pie of the same size, just enough to take the edge off without drowning it.

Here's the original family recipe:


And if you can't read the 3x5 card, here's another version:

Strawberry/Rhubarb Pie

1.5 cup sugar
4 Tbs minute tapioca
1/4 tsp salt
2+cups rhubarb
2+cups strawberries


Pastry shell for top/bottom
2 cups flour
2/3 cup + 2tbs crisco
1/2 tsp salt
5 Tbs cold water

Optional
1Tbs butter

Combine sugar /tapioca/salt.
Add fruit, mix well, let stand.
Spoon fruit into pastry shell.
Optional: dot with butter


For the pie crust, it's just: mix flour and salt, cut in shortening, sprinkle with water and you toss it with a fork, gather into a ball and roll into a shell.


Bake at 375 for about 40 mins. Watch the edge of the crusts; if the edges start to get too dark, remove from the oven, cover with strips of foil, and return to the oven. Wait for the fruit to really bubble or the rhubarb will be crunchy.

Friday, June 11, 2010

Always the last to know

I learned how to make whipped cream this week. Apparently, the ingredients are (get ready for this) cream, and a whipping instrument. You whip cream. Hence the name, whipped cream.

That was probably obvious to 99% of the folks out there, but growing up, we couldn't afford whipped cream. Whipped cream was for the rich kids, and it came in a pressurized can at the ice cream shop or maybe in a tub, kept in the freezer, at your grandma's when pumpkin pie was on the menu. Me, I was lucky to have a mayonnaise sandwich without bread, or maybe the infamous wish sandwich.


So I never made the connection that whipped cream was just cream that was whipped. I just thought it was a name someone gave it because that's what it looked like. So when I followed this recipe for strawberry shortcake, courtesy Dine and Dash, it was kinda cool figuring out that fresh whipped cream is pretty darn easy to make, tastes worlds better than anything in the frozen food section of your local grocer, and (best of all) is easy to whip up (oops! sorry!) on a moment's notice.


The reason I mention this is, I'm kind of an idiot. The other day someone said that they were intimidated to cook for me because I was always posting interesting looking menus on the world wide interweb. And while they meant it as a compliment, I was a bit taken back. (See, I'm an idiot ... shouldn't that be, I was taken back a bit?) Because I've tried very, very hard NOT to make this a "oooh, look at me" site. The exact opposite, in fact. Purpose #1 is quite simply to record the stuff we make, so we don't have to look too hard to find it later if we want to make it again. Purpose #2 is to have a little fun making mistakes as we grope our way through dinner each night. And purpose #3 is to throw some ideas out there, and with a little luck maybe someone else tried it a different way with better results.

So, looking forward to hearing about your "a-ha" culinary moment.

Once again, Dine and Dash's Strawberry Shortcake is here.

Wednesday, March 10, 2010

The Mother of All Cobblers

O, blackberry tart, with berries as big as your thumb, purple and black, and thick with juice, and a crust to endear them...with such a taste that will make you close your eyes and wish you might live forever in the wideness of that rich moment. —Richard Llewellyn, Welsh novelist (1907 — 1983)


Filling:
8 cups blackberries fresh or frozen
(thawed slightly if frozen)
1 cup sugar
¼ cup instant tapioca
Juice of ½ lime
Pinch of salt

Topping:
1 cup flour
1 cup coconut
¾ cup sugar
½ cup pecans, coarsely chopped
½ teaspoon baking powder
¼ teaspoon salt
½ cup cold butter, cubed
1 egg


Preheat oven to 375°. In a large bowl, toss berries with sugar, tapioca, lime juice and salt. Spoon into a 2-quart rectangular baking dish. Don’t be afraid to mix or try other fruits too—peaches, raspberries, blueberries, etc. Use a little more tapioca with frozen fruit or expect the juices to be a bit thinner.

In a large mixing bowl, combine flour, coconut, sugar, pecans, baking powder and salt. Knead in the butter using your fingers. The mixture should resemble coarse sand; avoid overmixing. Blend in egg with your fingers; dough will be sticky. Spread topping over berries in clumps, covering evenly.


Bake for 45–50 minutes or until golden and crisp and filling is thick and bubbly. Place a cookie sheet under the dish during baking to catch spills.

Remove from oven and cool on a wire rack for 1 hour. Serve warm with vanilla ice cream.

Impressions — Molten Chocolate Lava Cake

Here's a great tasting little cake with a little bit of show. By timing them to come out right when you're ready to serve, you get a mini-volcano of chocolate lava running out of the cake. It's really, really, really hard to screw these up.

1 stick butter, plus more for preparing the ramekins
6 ounces bittersweet chocolate,chopped
2 large eggs
2 large egg yolks
¼ cup sugar
Pinch of salt
2 tablespoons flour, plus more for dusting


Preheat oven to 450°. Butter and flour four 6-ounce ramekins, tapping
out excess.
Melt the stick of butter with the chocolate in the microwave or in a double boiler and whisk until smooth. In a medium bowl, beat the whole eggs with the egg yolks, sugar and salt with an electric mixer at high speed until pale and thickened.


Quickly fold the chocolate into the egg mixture along with the 2 tablespoons of flour until just incorporated. Spoon the batter into the ramekins.


Set the ramekins on a baking sheet and bake for 12 minutes, or until the sides of the cakes are firm but the centers are still soft.


Let the cakes cool for 1 minute. Run a knife around the edge of each cake, cover with an inverted dessert plate and turn it over. Let the cakes stand for a few seconds before unmolding, then serve.

Monday, August 11, 2008

Peach Pie

Betty Crocker's 9 inch Pastry shell

1 cup all-purpose flour
½ tsp salt
⅓ cup plus 1 Tbs shortening
2-3 Tbs cold water

Measure flour and salt into bowl. Cut in shortening thoroughly. Sprinkle in water, 1 tablespoon at a time, mixing until all flour is moistened and dough almost cleans side of bowl (1 to 2 teaspoons water can be added if needed).

Gather dough into ball; shape into flattened round on lightly floured cloth-covered board. (for Two-crust Pie, divide dough in half and shape into 2 flattened rounds.) With floured stockinet-covered rolling pin, roll dough 2 inches larger than inverted pie pan. Fold pastry into quarters; unfold and ease into pan.

For One-crust Pie: Trim overhanging edge of pastry 1 inch from rim of pan. Fold and roll pastry under, even with pan; flute. Fill and bake as directed in recipe.

For Two-crust Pie: Turn desired filling into pastry lined pie pan. Trim overhanging edge of pastry 1/2 inch from rim of pan. Roll second round of dough. Fold into quarters; cut slits so steam can escape. Place over filling and unfold. Trim over-hanging edge of pastry 1 inch from rim of pan. Fold and roll top edge under lower edge, pressing on rim to seal; flute. Cover edge with 2- to 3-inch strip of aluminum foil to prevent excessive browning; remove foil last 15 minutes of baking. Bake as directed in recipe.

Note: If using self-rising flour, omit salt. Pie crusts made with self-rising flour differ in flavor and texture from those made with plain flour.
Note: If possible, hook fluted edge over edge of pie pan to prevent shrinking and help keep shape.
Note: Simply roll dough out on wax paper, invert dough and wax paper into pie dish, and peel off wax paper.

Filling:

5 cups sliced fresh peaches
1 tsp lemon juice
1 cup sugar
¼ cup all-purpose flour
¼ tsp cinnamon
2 Tbs butter

Heat oven to 425°. Prepare pastry. Mix peaches and lemon juice. Stir together sugar, flour and cinnamon; mix with peaches. Turn into pastry-lined pie pan; dot with butter. Cover with top crust which has slits cut in it; seal and flute. Cover edge with 2- to 3-inch strip of aluminum foil to prevent excessive browning; remove foil last 15 minutes of baking.

Bake 35 to 45 minutes, or until crust is brown and juice begins to bubble through slits in crust.

Reference: Betty Crocker’s Cookbook - 1972, Page 316.